Section 1 of 8
Getting started
Sign in, set your zip, and pick your units. Two minutes and you're ready to plan.
Plant It Planner needs two things to plan your season: who you are, and where you are. Sign in once and the app remembers everything across iOS, Android, and the web — change a plant on your phone and it shows up on your laptop in seconds.
Your zip code is how the app figures out your last and first frost dates, which drives every planting recommendation it makes. You can always change it later in Settings.
- 1
Sign in
Open the app and pick Apple, Google, or Email. The account you choose is the one your data syncs to, so use one you'll keep around.
If you've used Plant It Planner before, just sign in again with the same provider — your gardens, plants, and journal entries all come back automatically.
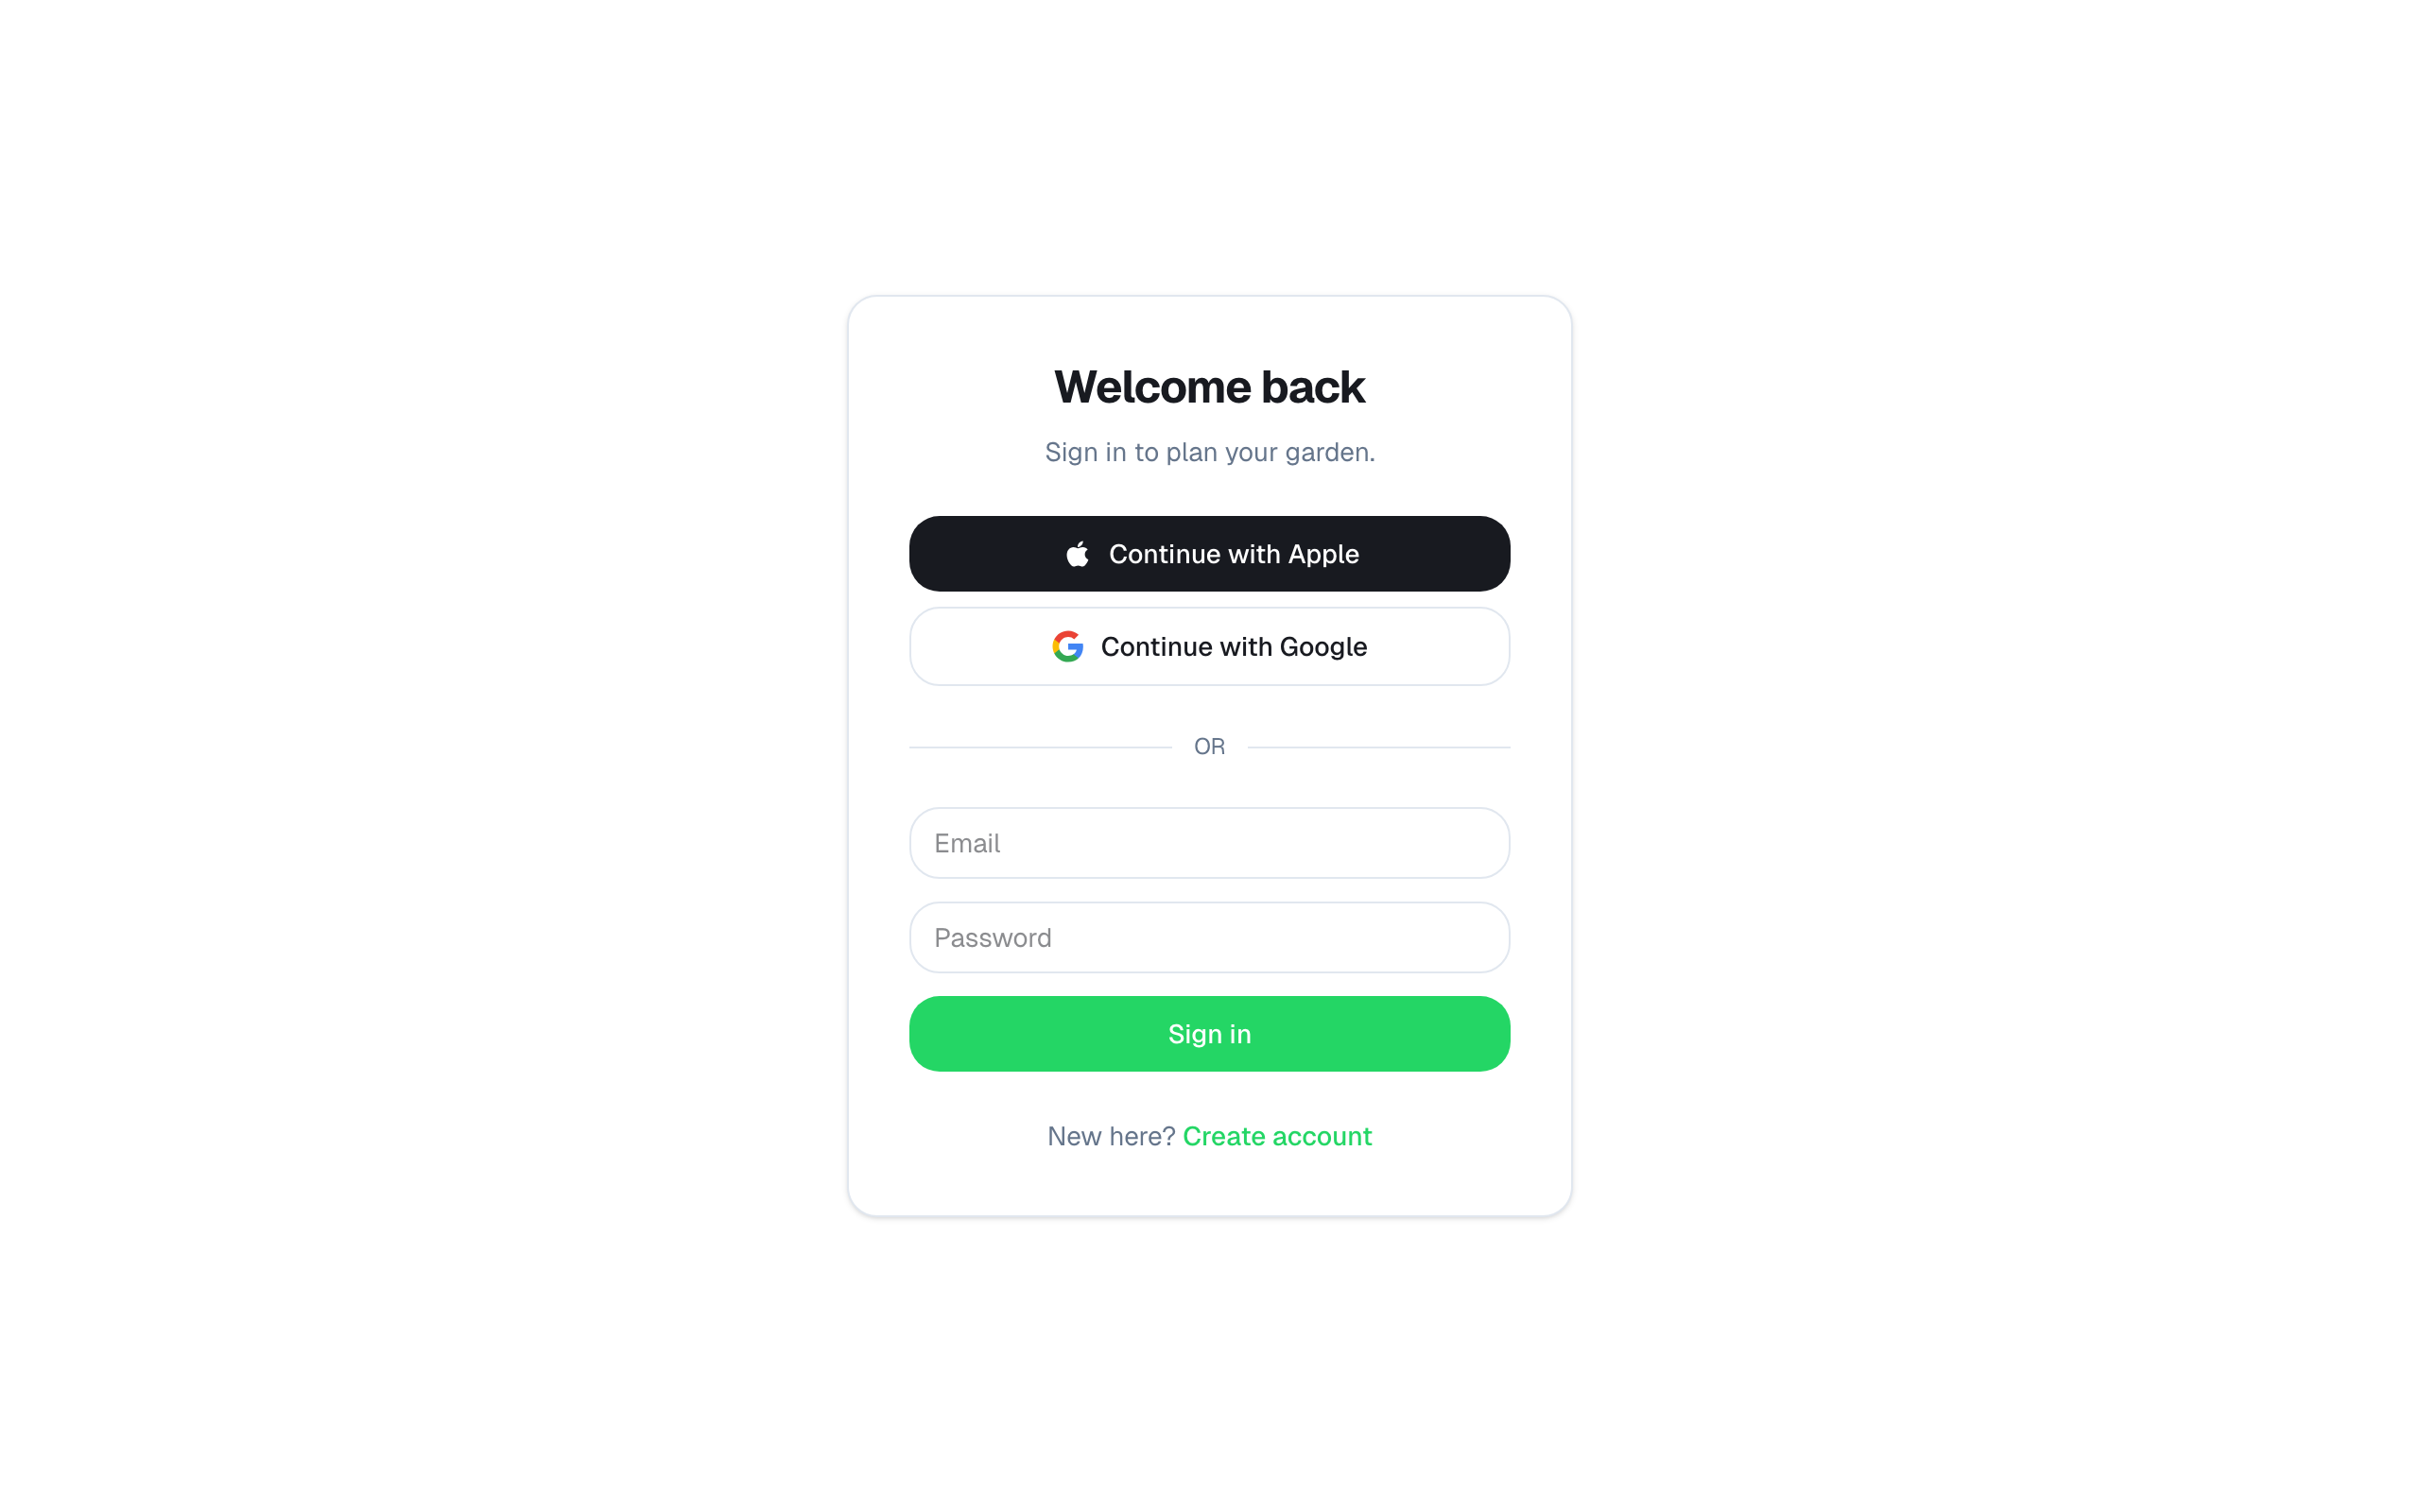
Sign-in screen. - 2
Enter your zip code
After your first sign-in, the app will ask for your zip. This sets your last frost and first frost dates from a built-in dataset, so the schedule lines up with what's actually happening outside your window.
If you live somewhere without a zip code, you can enter the closest one — frost dates are regional, not address-precise.
Enter your zip — frost dates fill in automatically. - 3
Pick your units and theme
From Settings you can flip between imperial and metric, switch theme (light, dark, or system), and toggle notifications. Bed sizes show in feet by default; pots in inches.
Notifications are off until you turn them on. Frost alerts specifically need notifications enabled before they fire.
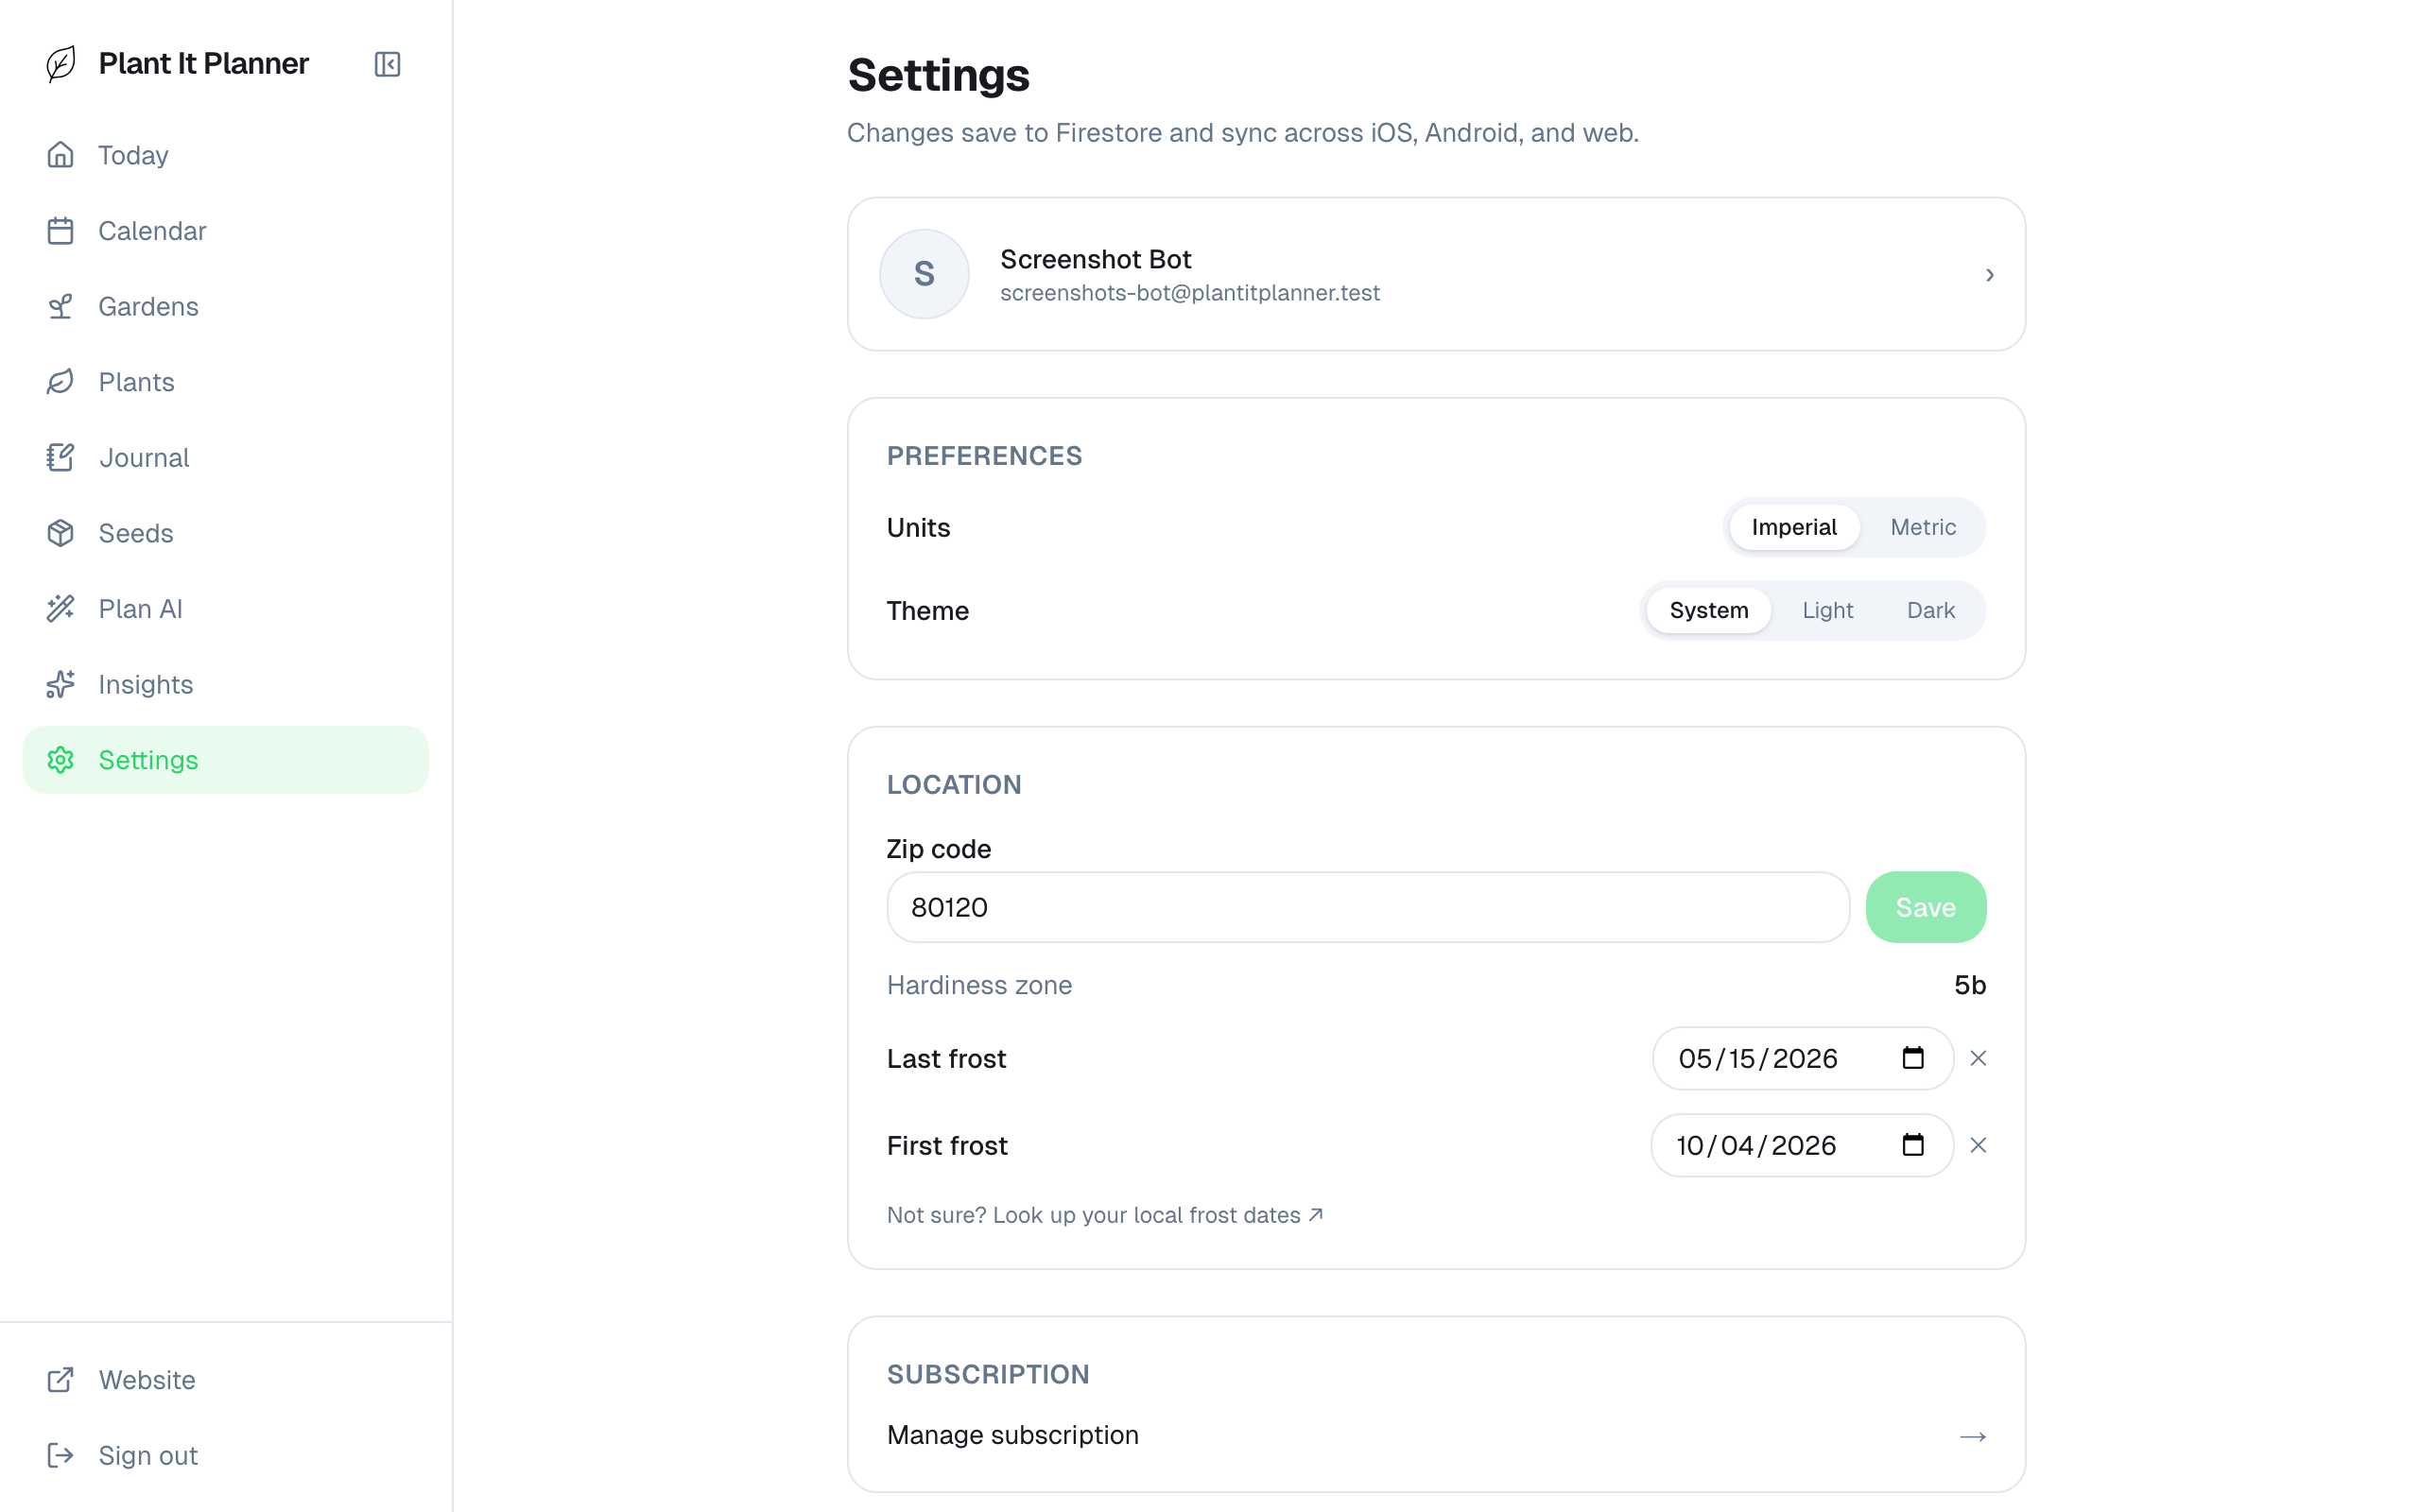
Settings — units, theme, and notifications all live here.
Tips
- Forgot your password on the email path? Use the Forgot password link on the sign-in screen. The reset link will arrive within a minute.
- Want to try the app without committing? Sign up with email, kick the tires, and delete the account from Settings if it's not for you.